In my last post I mentioned organization and how I’d like more of it. There’s one organization project I did complete over the holidays and I am pretty proud of the result. It’s the “craft” drawer, aka the “drawer where you cram a whole bunch of crap”.
Right off our kitchen we have a set of cabinets and at the bottom is this very wide, very deep drawer. In the drawer we stored all of our craft supplies and anything else we needed to get rid of fast when trying to sit down to dinner.
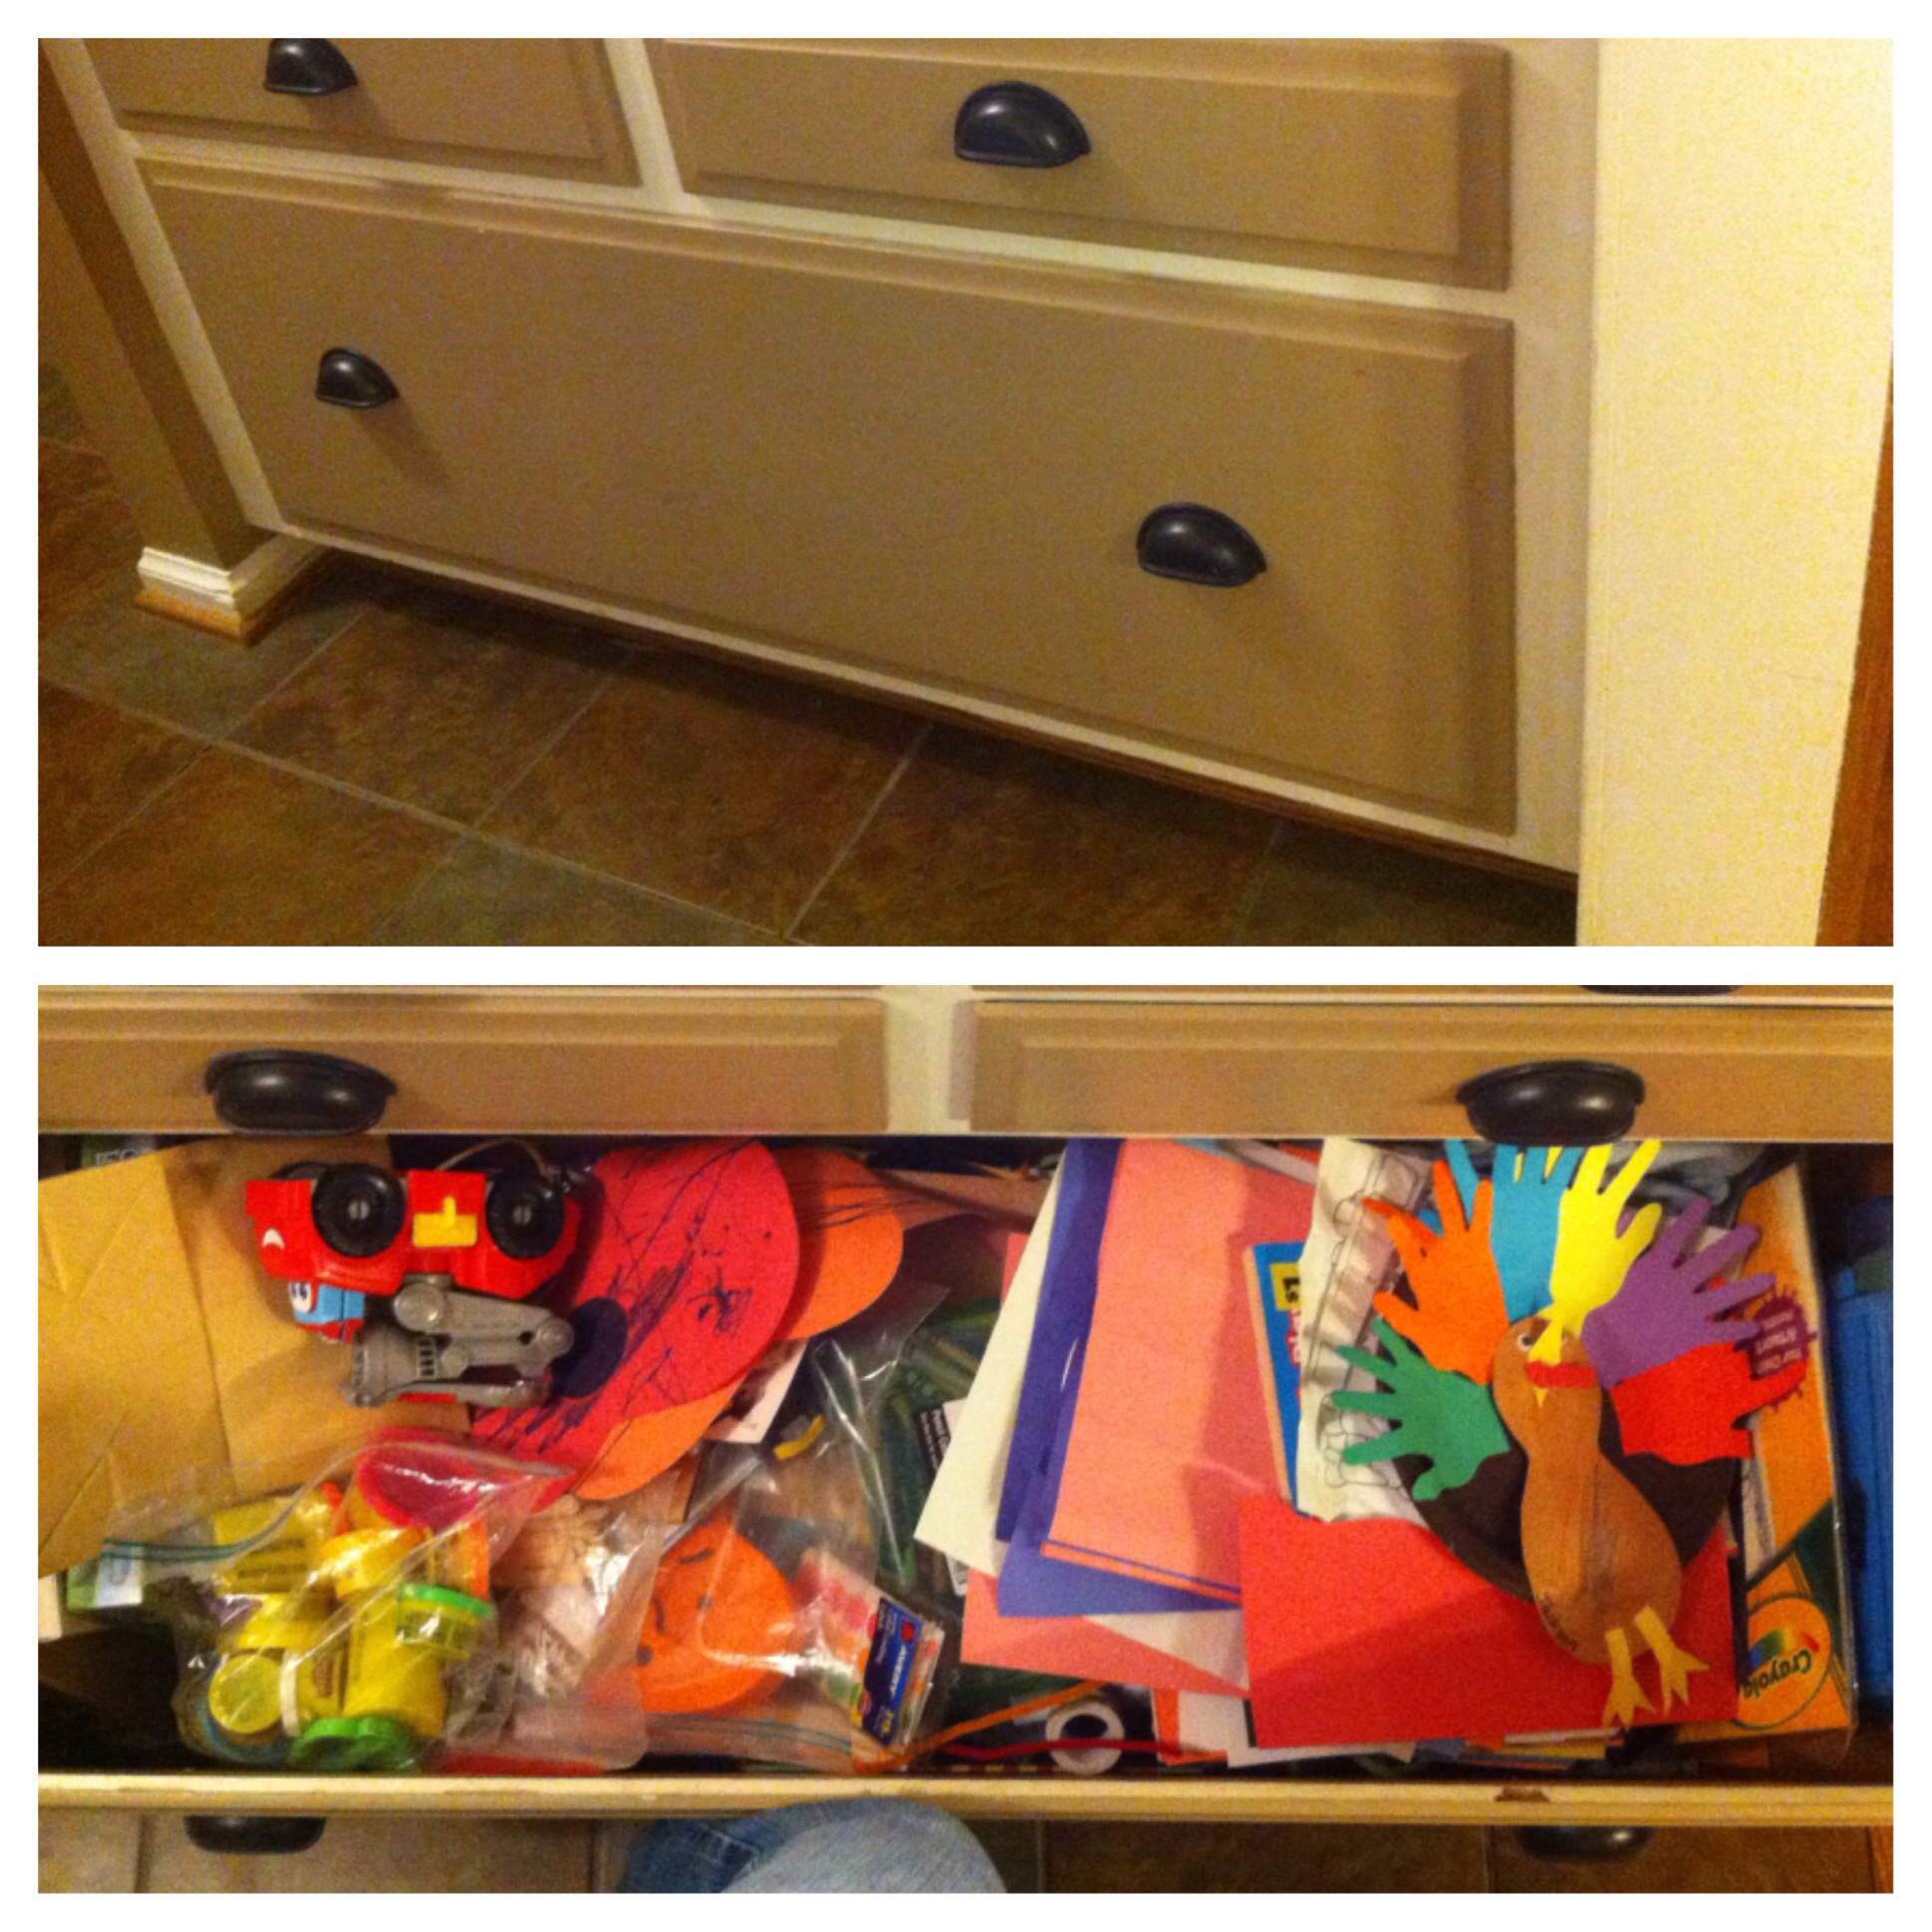 My kids love to do crafts so we have a plethora of craft supplies. The obvious problem with the craft drawer is that we couldn’t find anything in there without a significant effort. The other problem is that the drawer was so disorganized and crammed full that the contents ended up all over the kitchen. We stopped putting them away and ended up piling them on the counters. Then the crafts started getting mixed up with other stuff and it was just a downhill spiral from there.
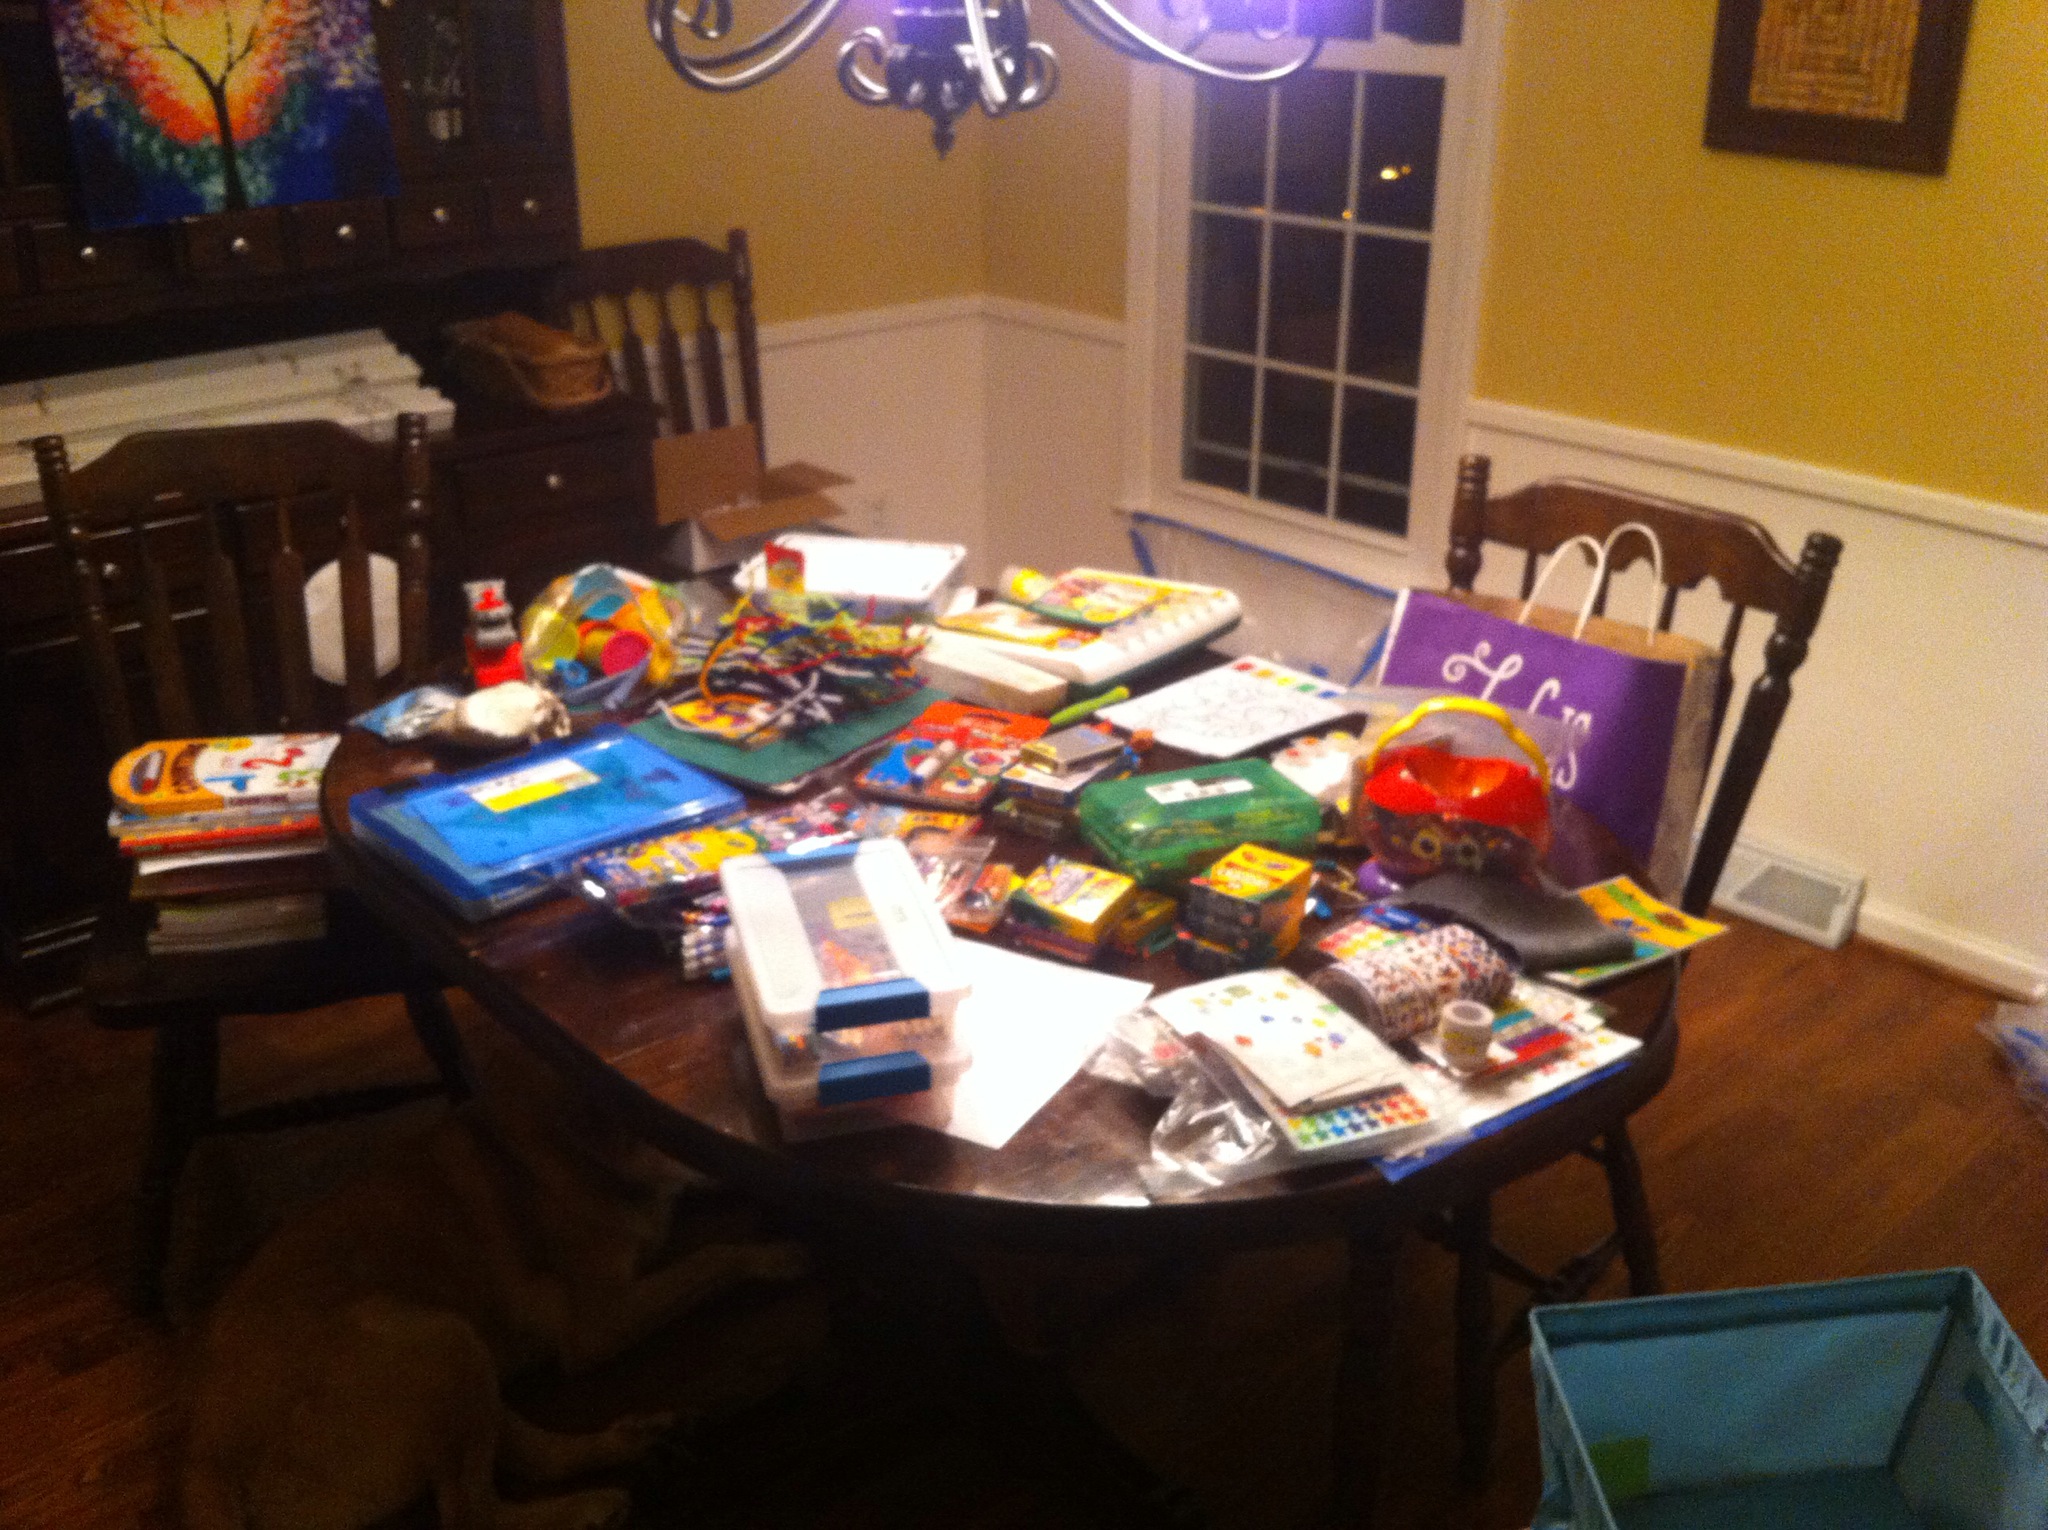
The first thing I did was empty the entire contents of the drawer onto the dining room table. Can you believe all of THAT was in one drawer?
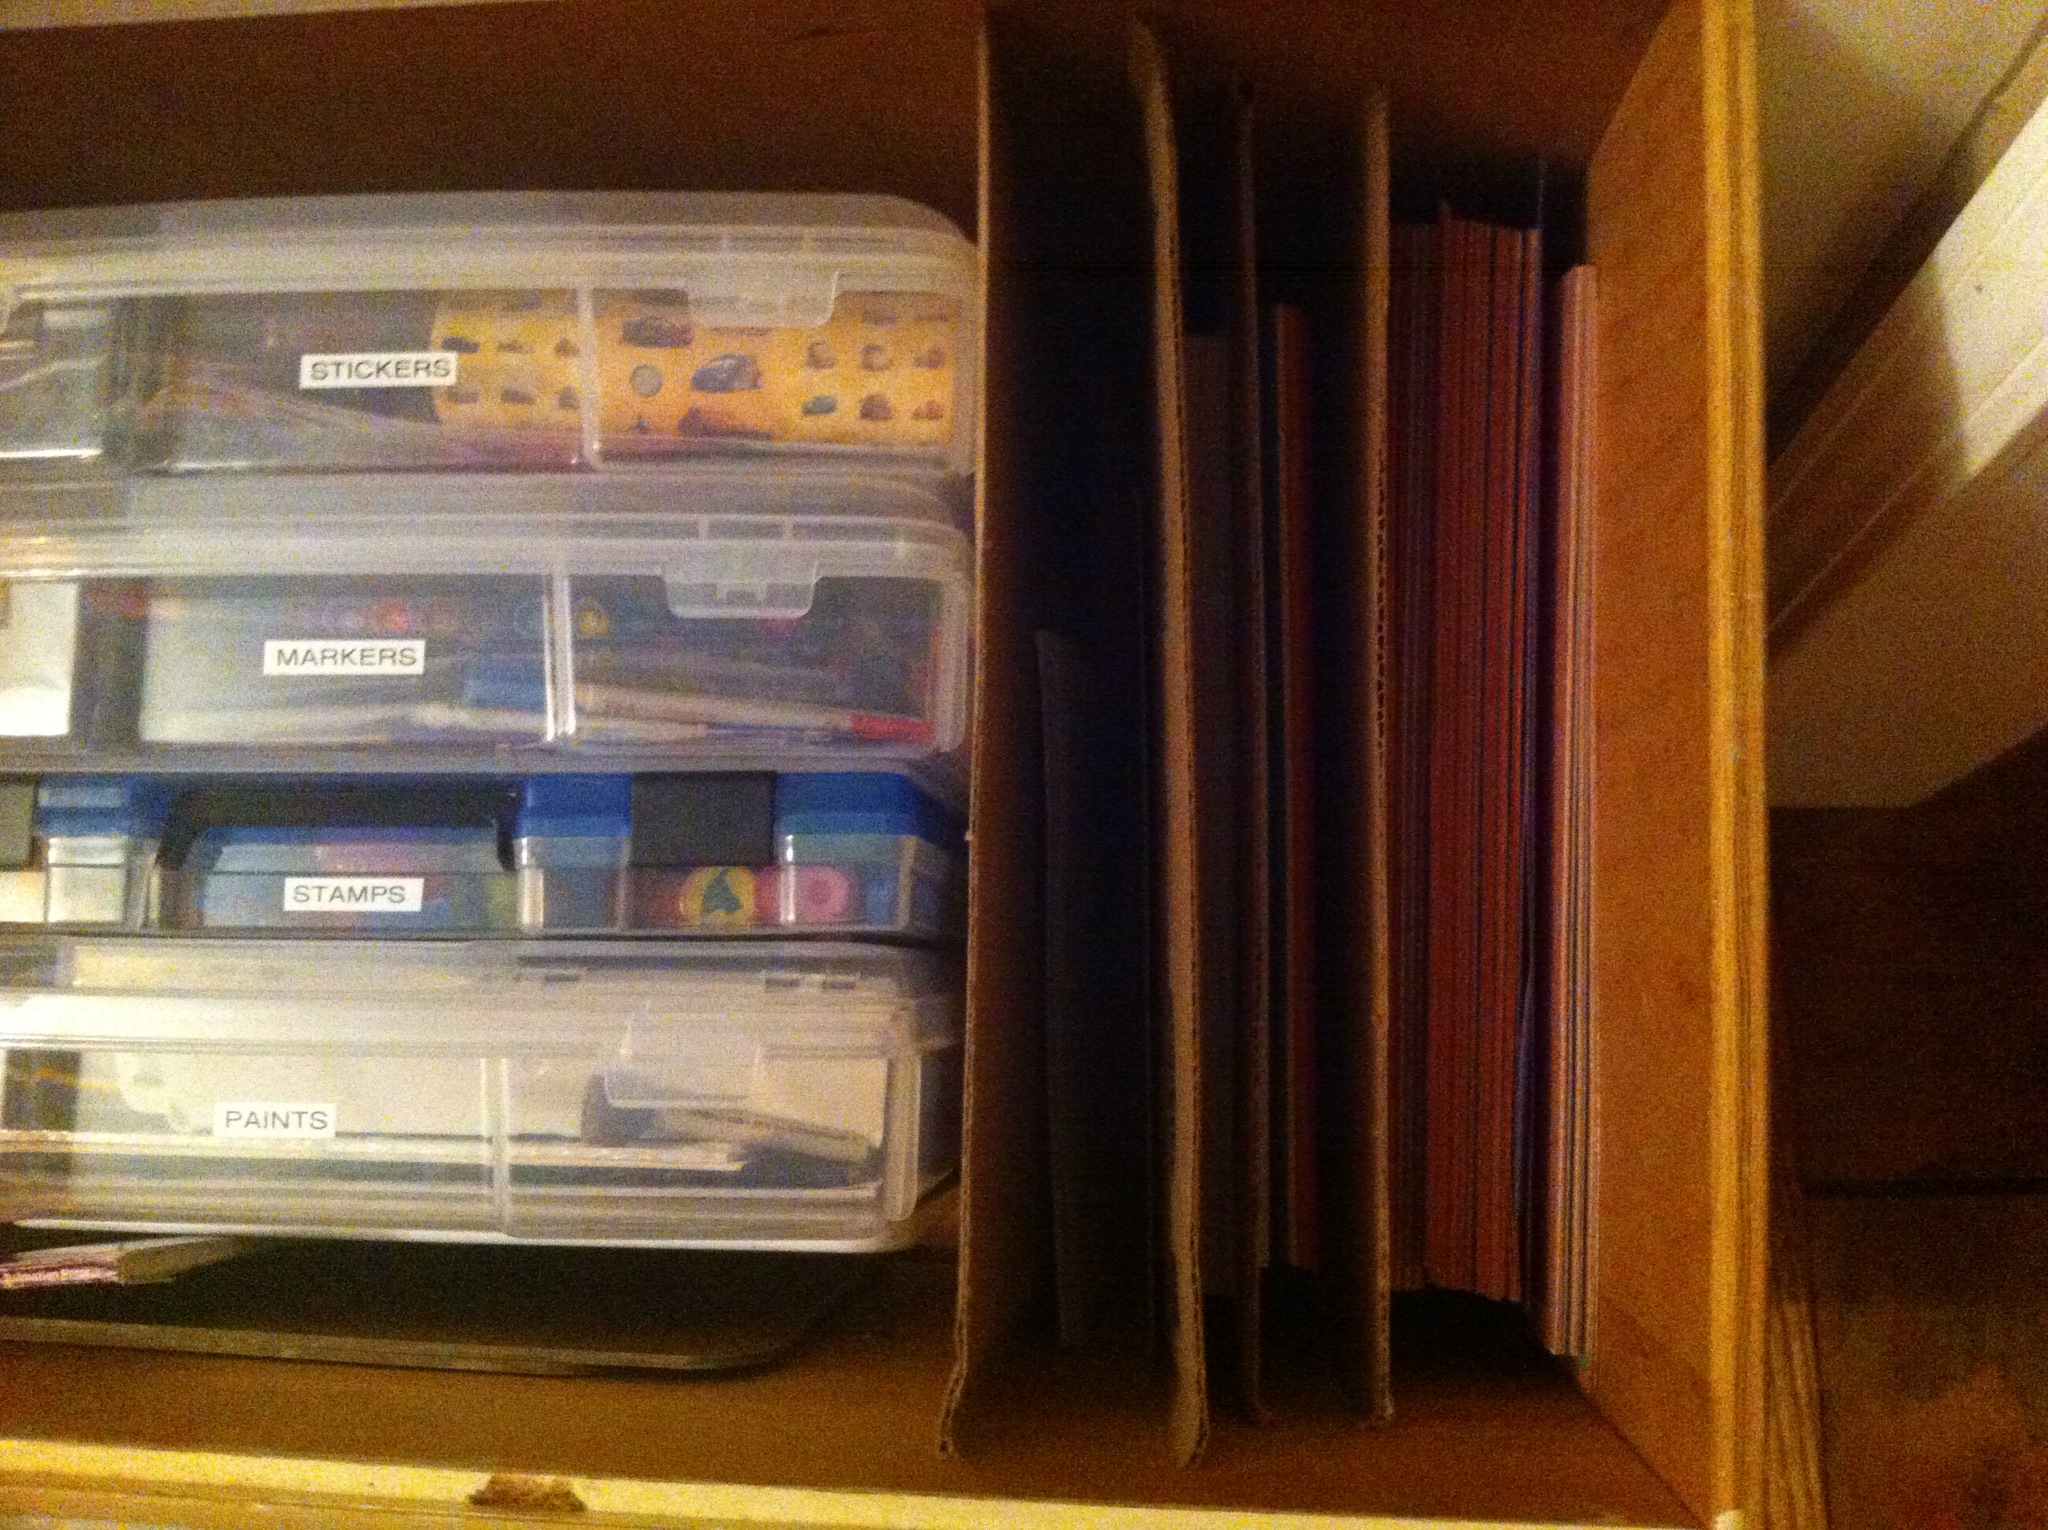
 I sorted out all the trash and used up supplies that needed to be discarded. Then I made a list of everything that was in the drawer and started grouping it into categories like stickers, crayons, markers, stamps, etc.
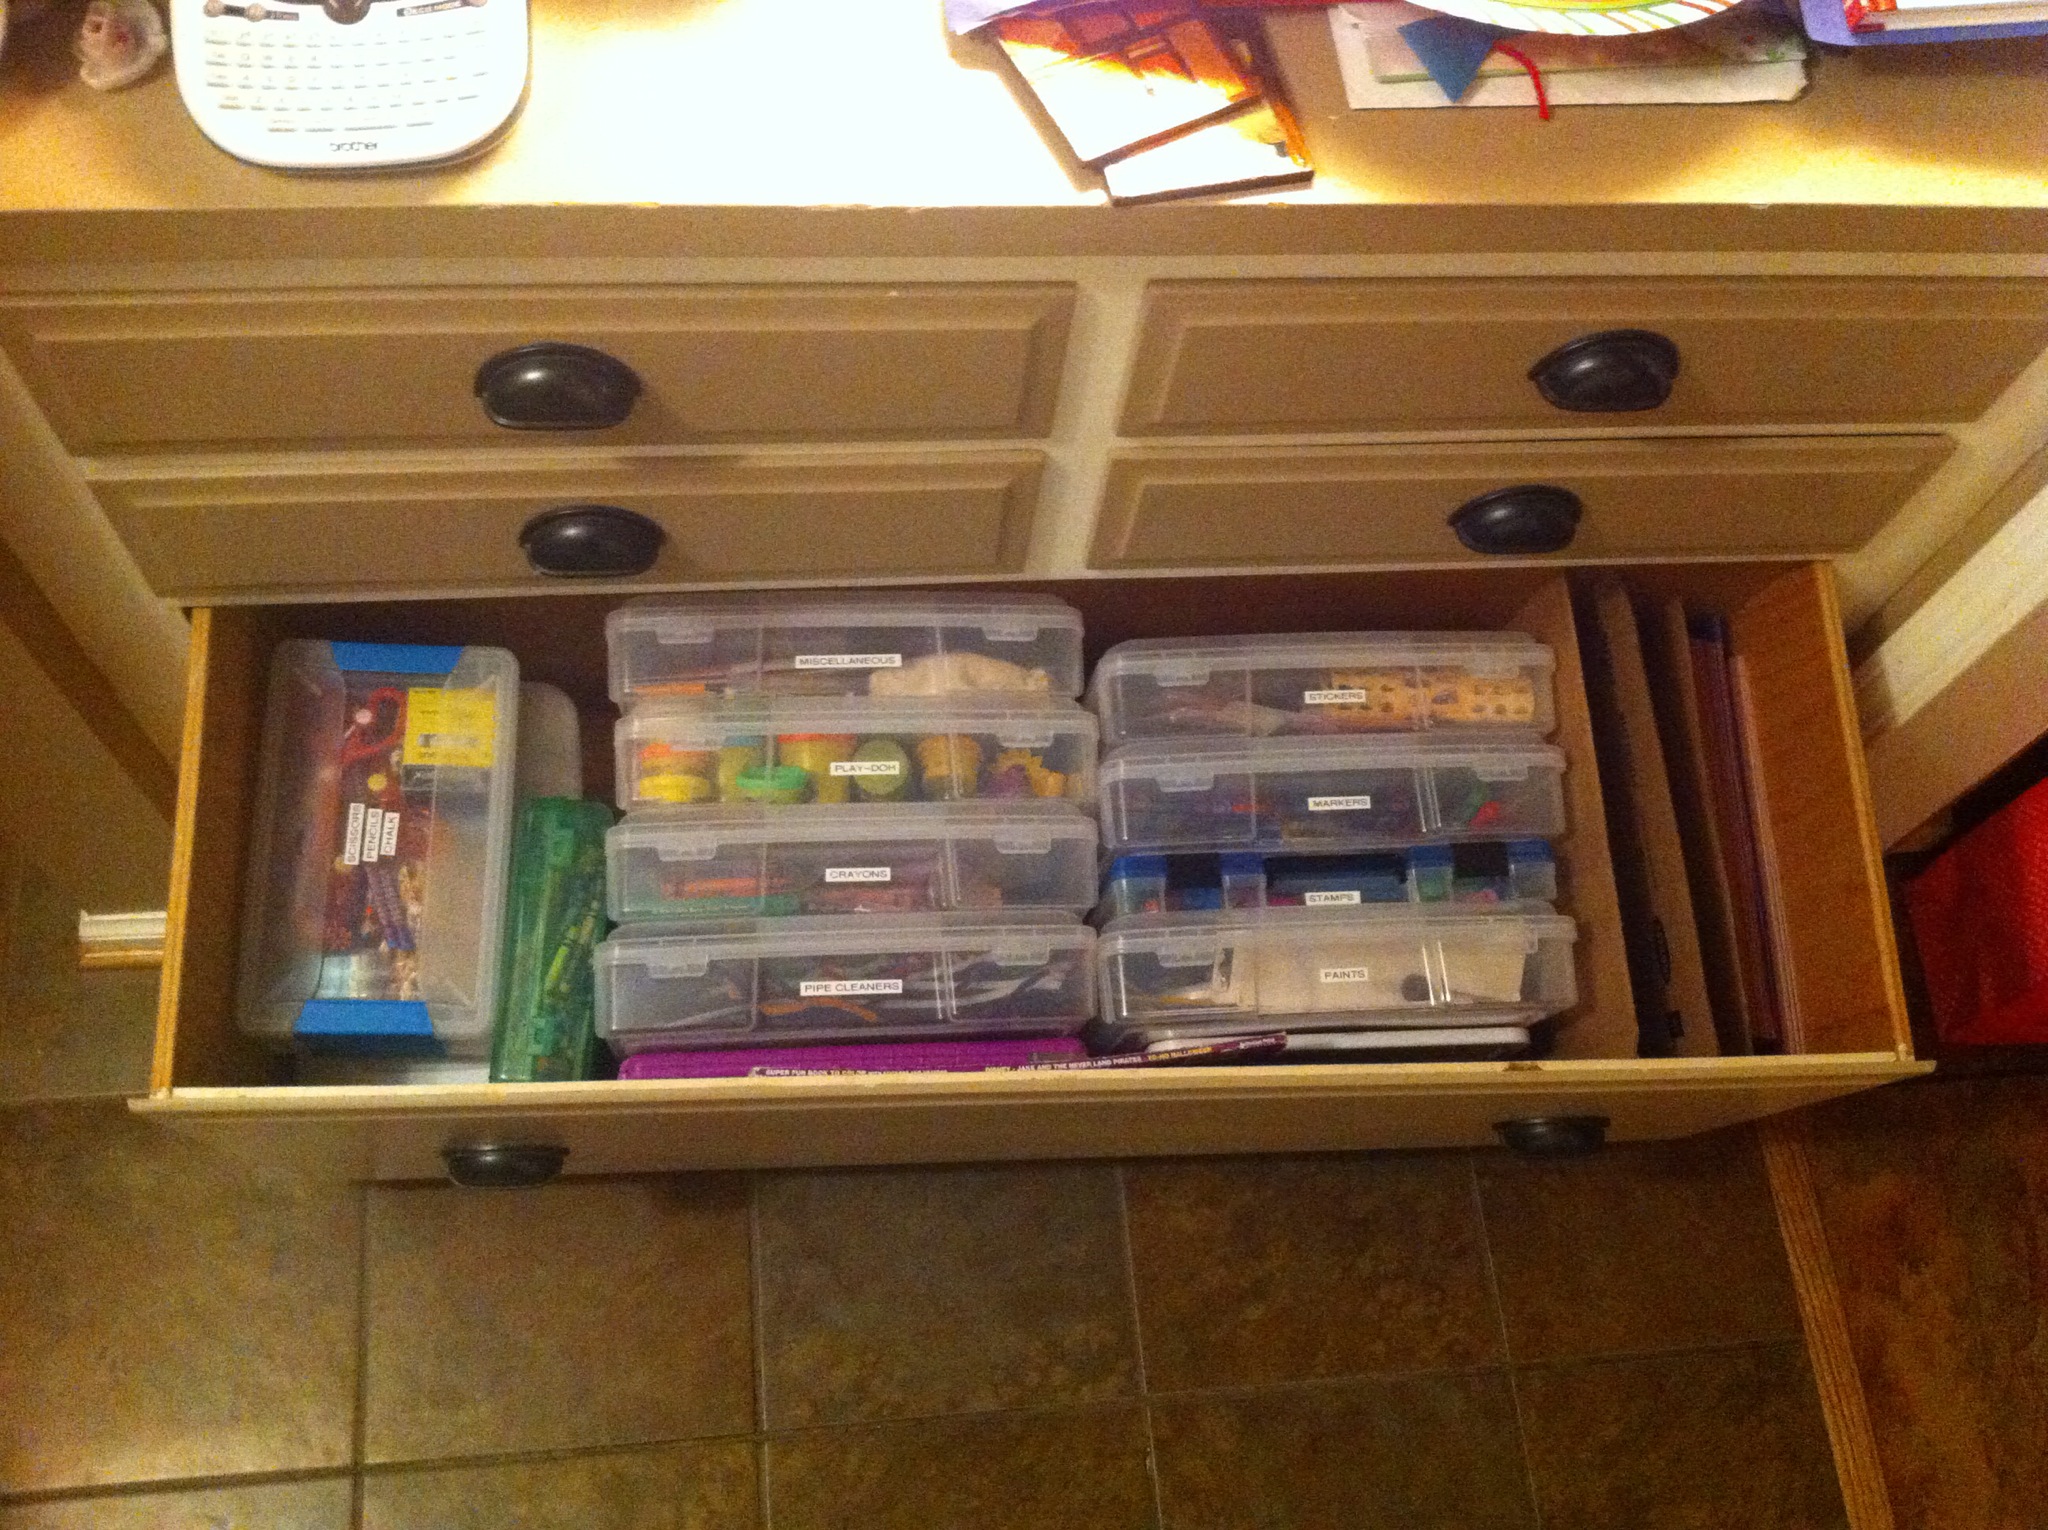
I knew I wanted vertical storage so that supplies would be easy to get in and out of the drawer and not be piled on top of each other. I also knew I wanted slots for the different kinds of paper to keep it organized. I measured the size of the drawer and made a trip to Michael’s and Joann and also looked online before I finally found exactly what I was looking for at Hobby Lobby. And it was the Iris Portable Project Case.
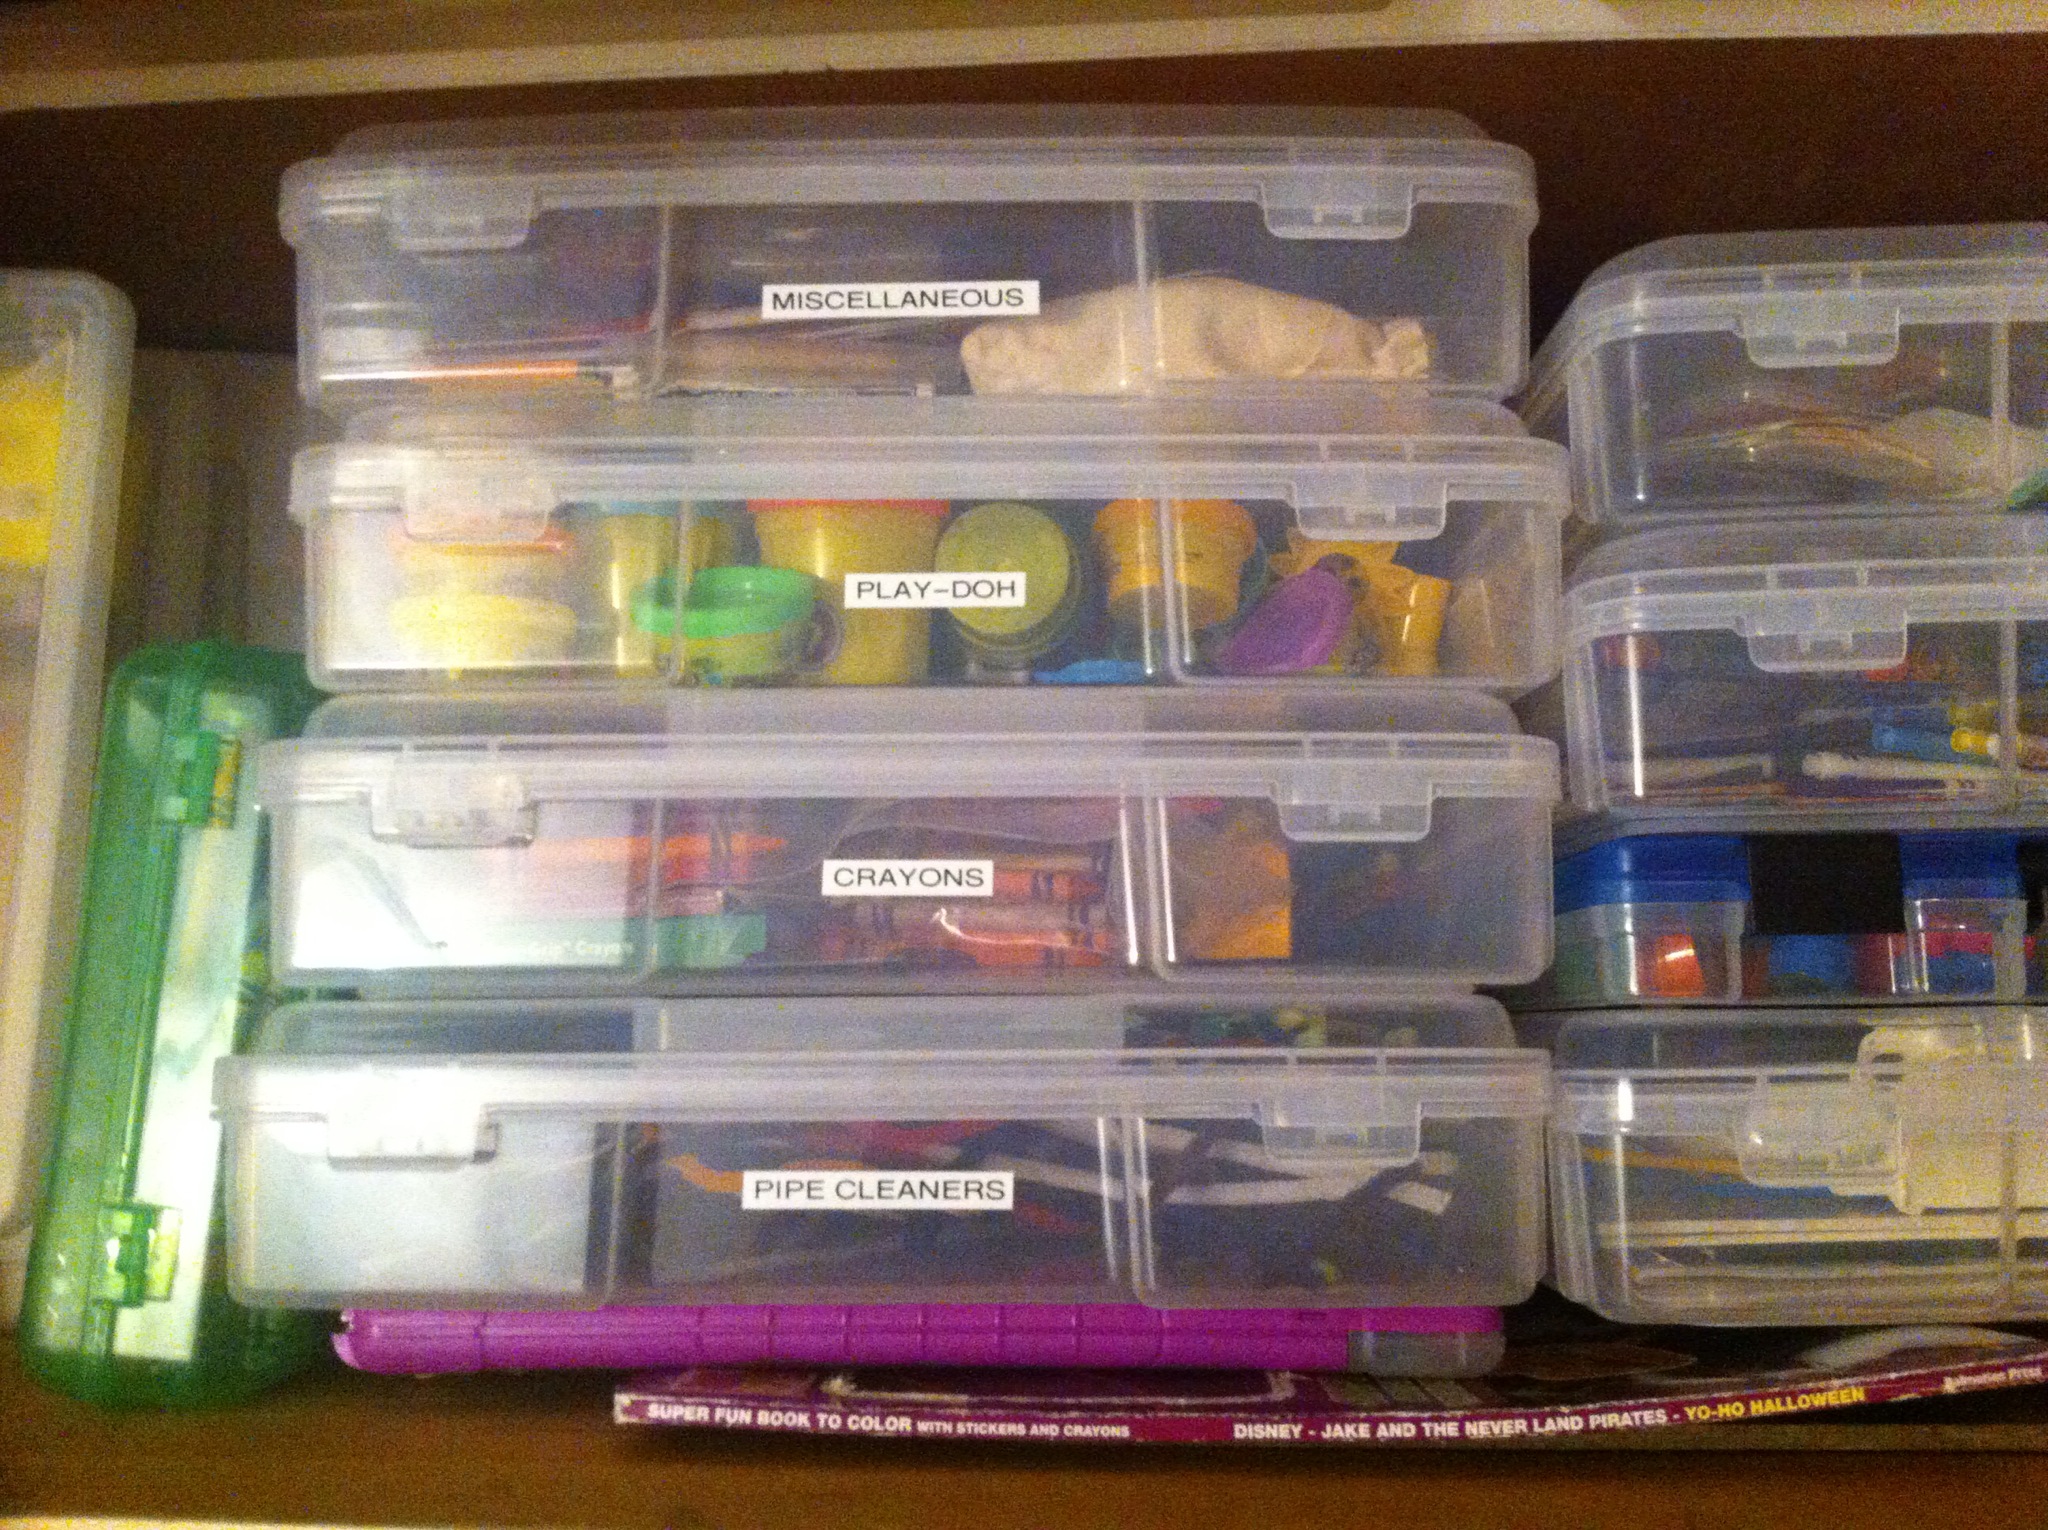 It was the perfect size to slide vertically into the drawer. I ended up purchasing seven of them after going back to Hobby Lobby over several days using a 40% off coupon each time. Each case holds different supplies and I even labeled them with my label maker. Fancy I know.
Along one side of the drawer I inserted cardboard dividers (custom cut by Benzo from miscellaneous boxes we were going to recycle). Now there are slots for construction paper, coloring paper, cardstock and cutting paper. If you are wondering “cutting paper” is miscellaneous junk mail we toss in there for when the older one likes to practice cutting.
 The finished drawer ended up with seven new cases plus one case we already had (the smaller blueish one labeled stamps). There’s a bit of space along the side to slide in the chalkboards, a really big coloring book, and a little dry erase board. Then on the other side from the paper slots there are a few smaller cases that are stacked on top of each other that hold things like pencils, scissors, beads and other smaller items. They are small so they are easy to shift around in the drawer.
 The best part about the whole thing is that it has actually WORKED. Now my 3 year old can get out a box and take it to the table and do a project. Then when he wants to do something else, we can gently encourage him 🙂 to put away the current box before getting out another box. Also when we are trying to clear the table for dinner, it’s much easier to put craft supplies away and slide the cases in the drawer instead of just tossing everything on the counter in a big jumble.
Before and after:
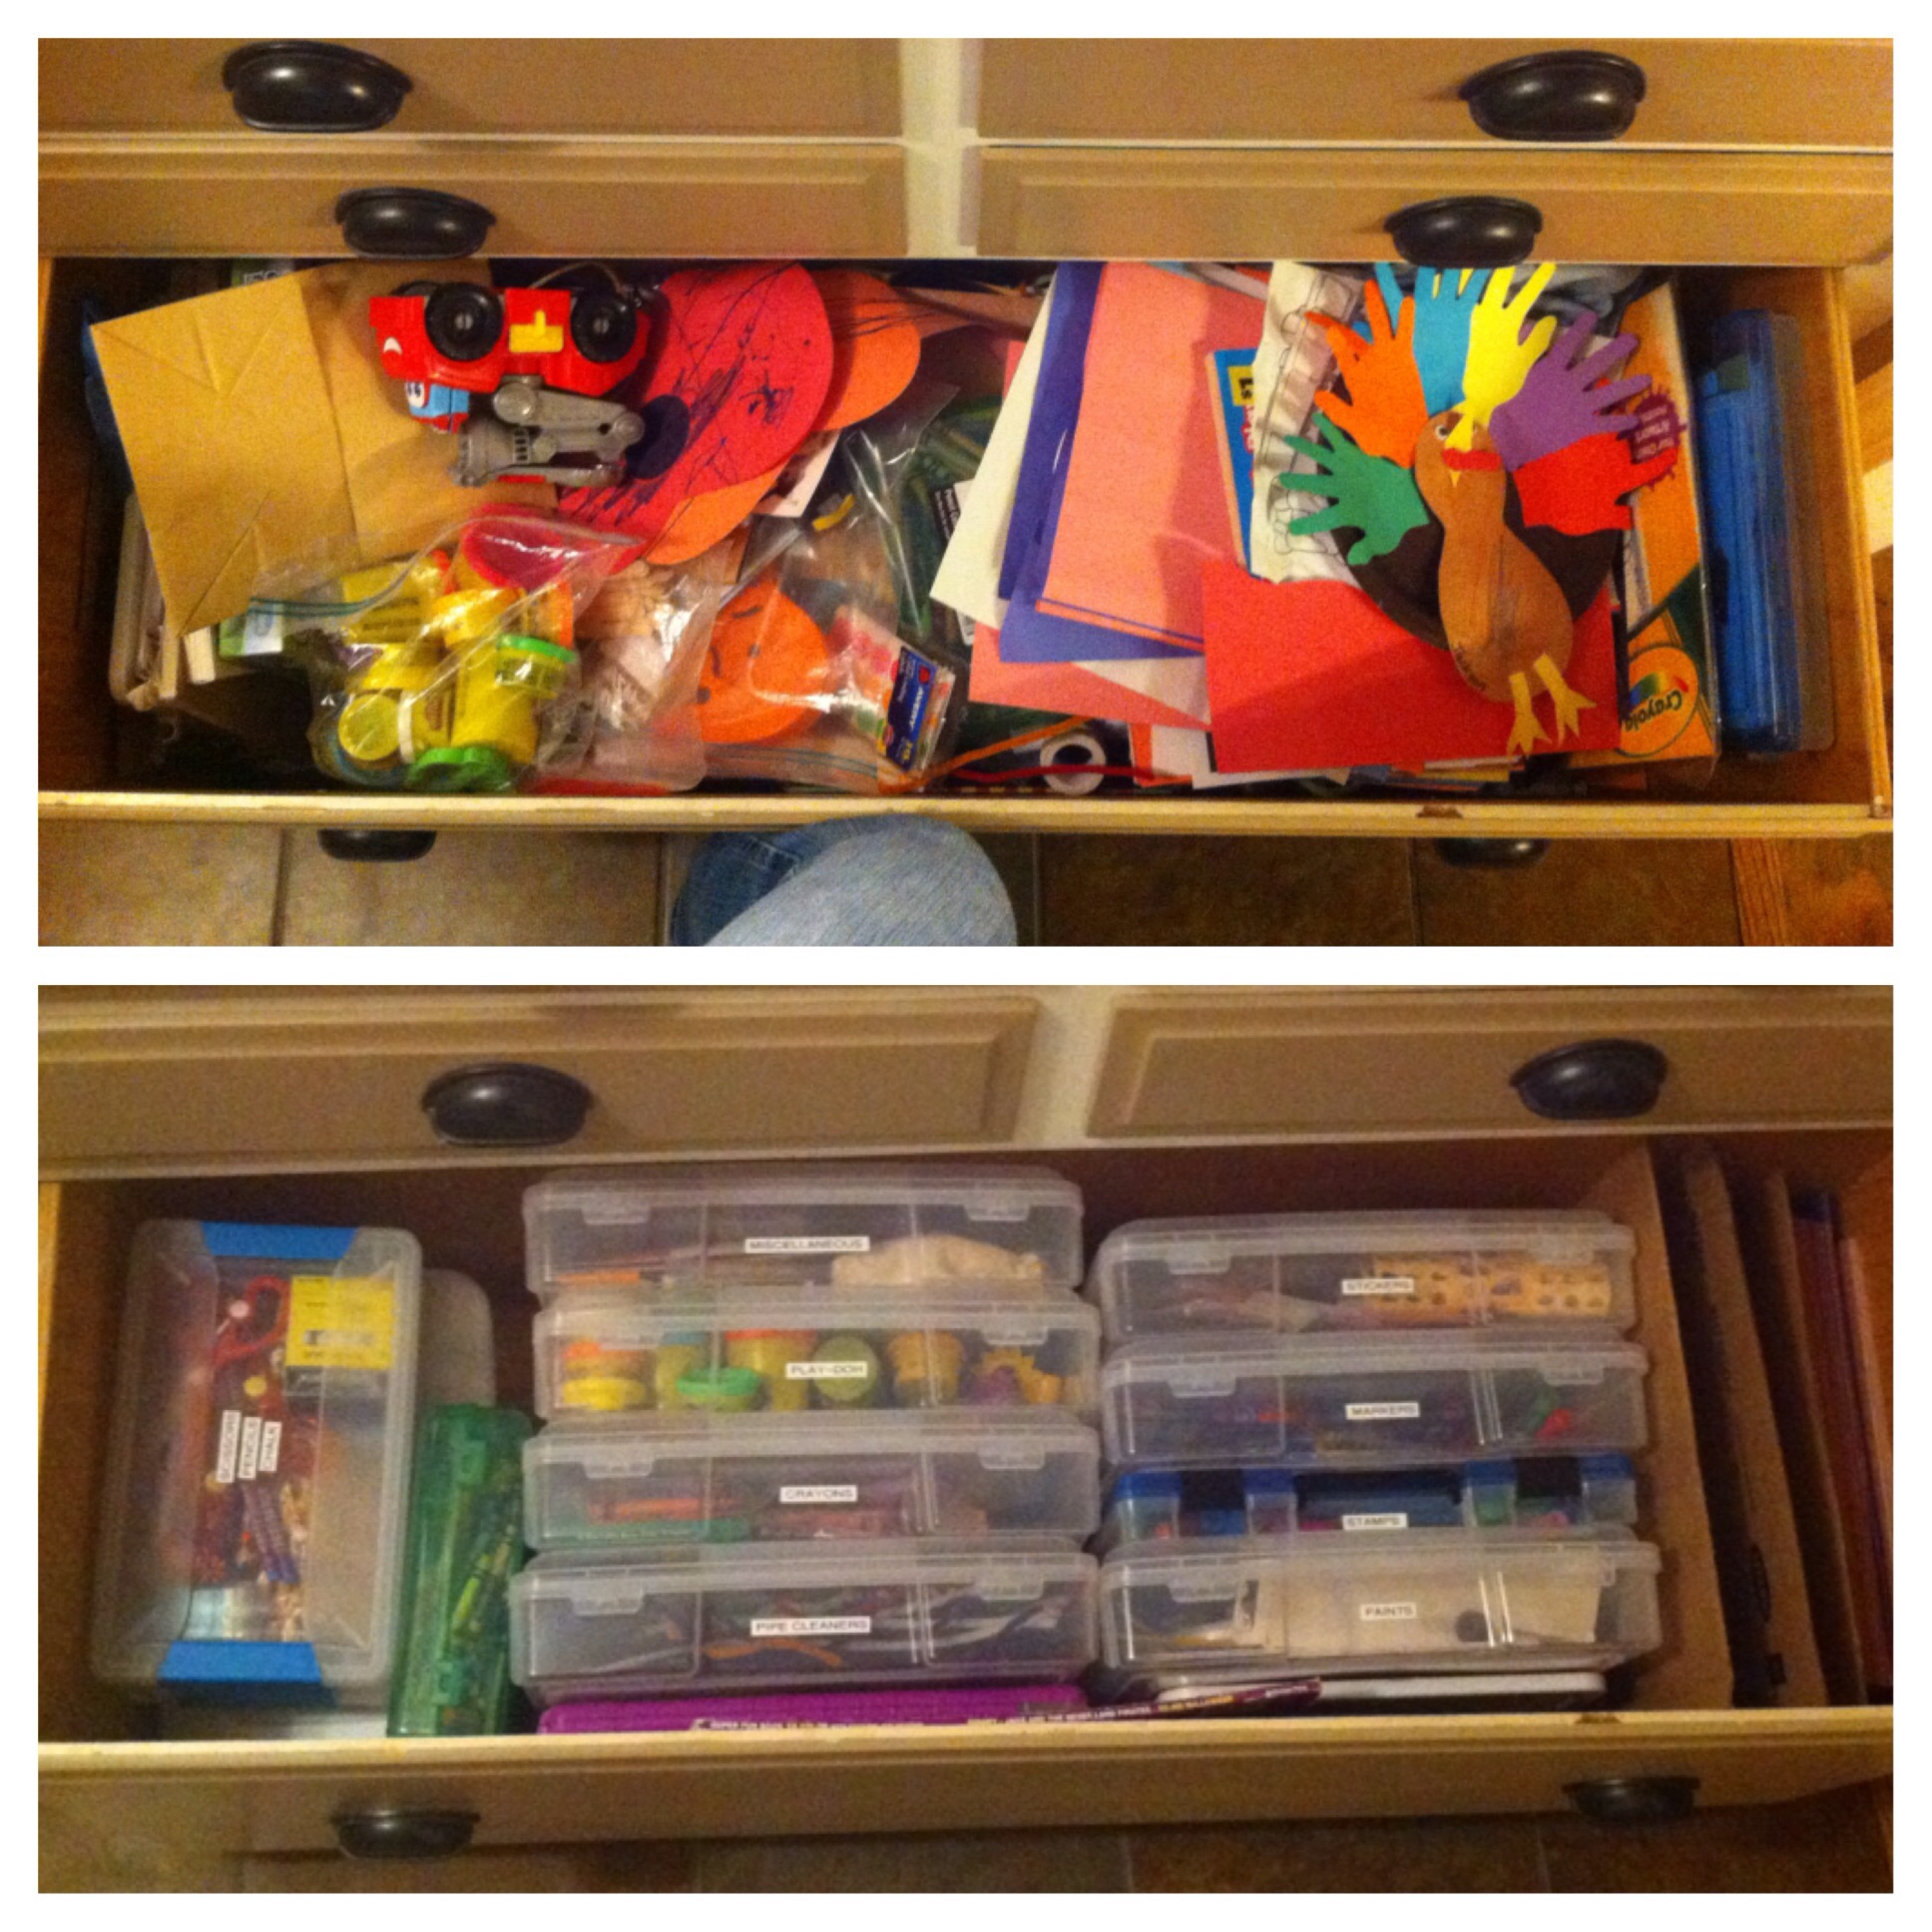
Don’t get me wrong, our kitchen is still cluttery, but it’s definitely LESS cluttery with this new system. I couldn’t be happier with how it turned out. I am also proud of myself for my plan of attack. Assessing the situation, researching options and finally putting it into action. It’s so tempting to go out and buy a bunch of organizing supplies without really knowing what you need. Those craft supplies sat on my dining room table for a good three days before it was all back in the drawer. That was tough even for me!
Hopefully this sparks an organization idea in you. I know even just posting about it has given me more motivation to tackle the next project – the upper cabinets!


